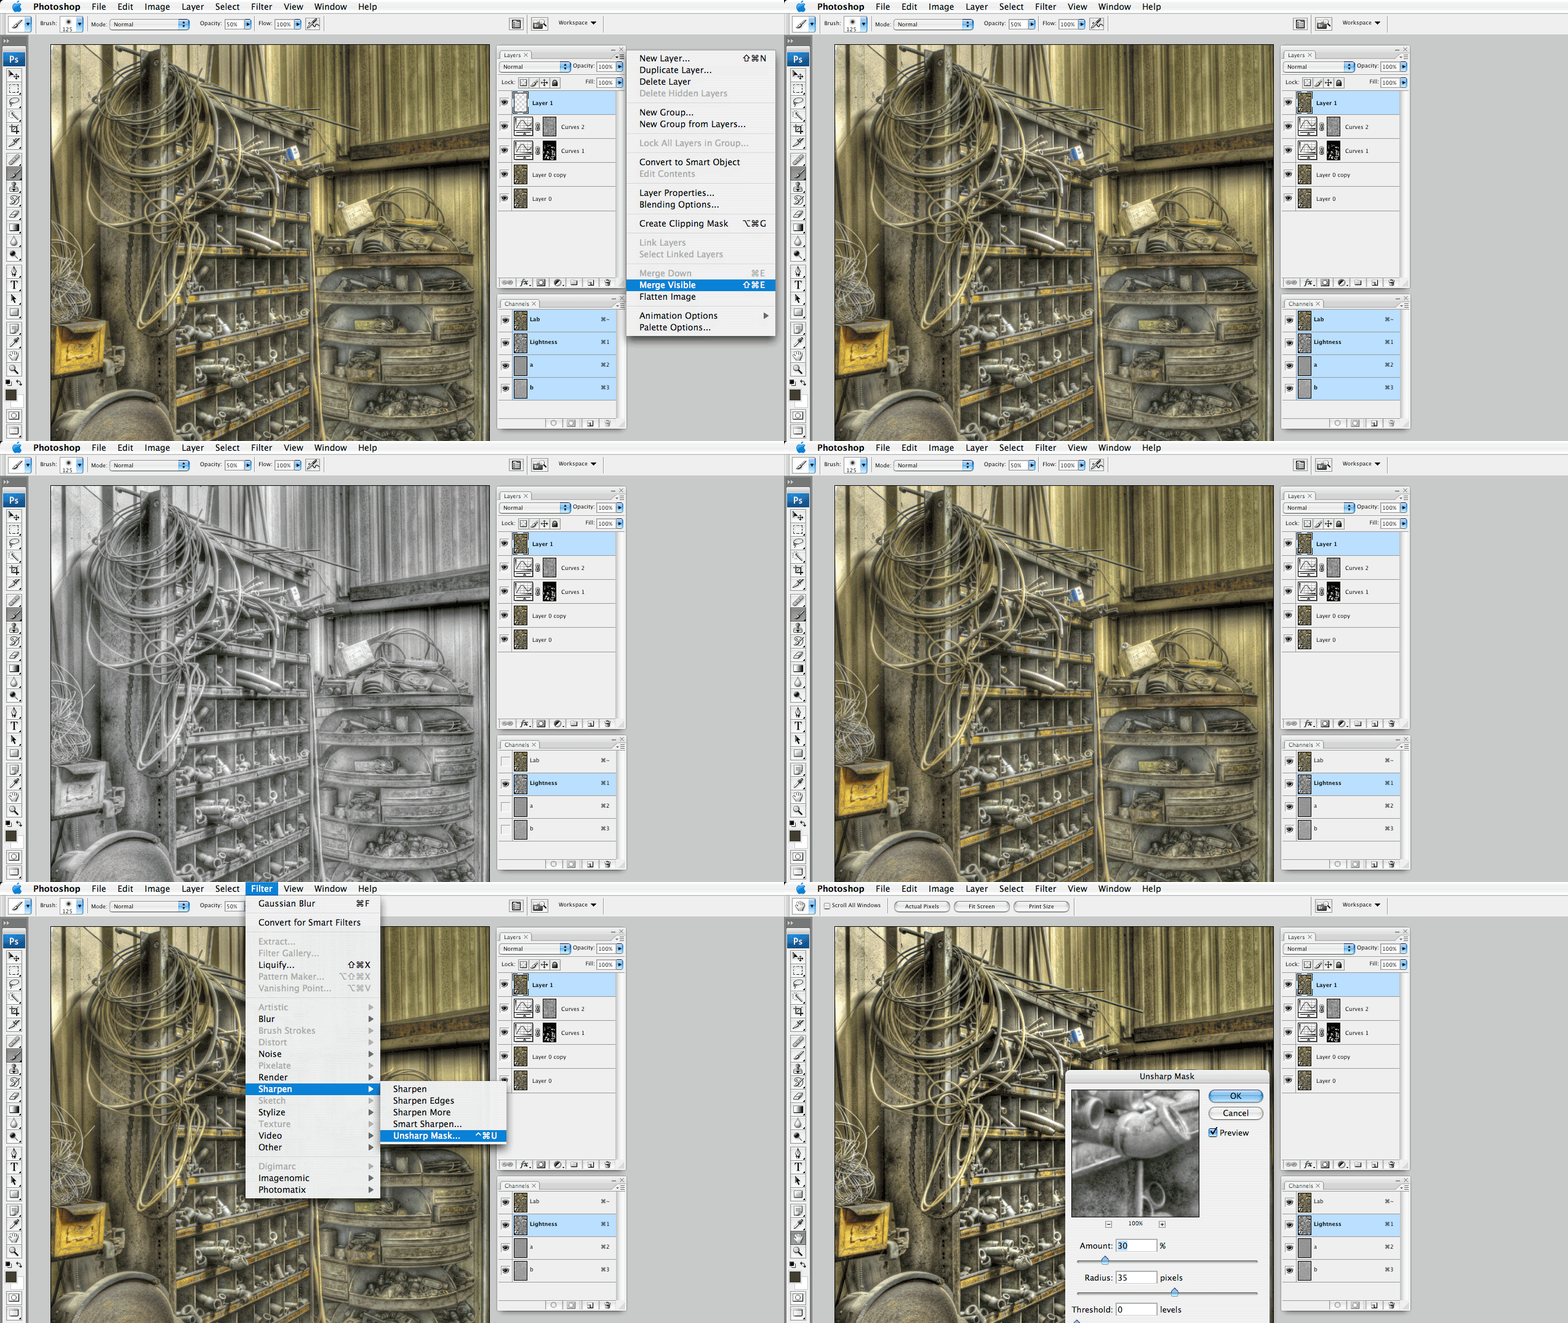

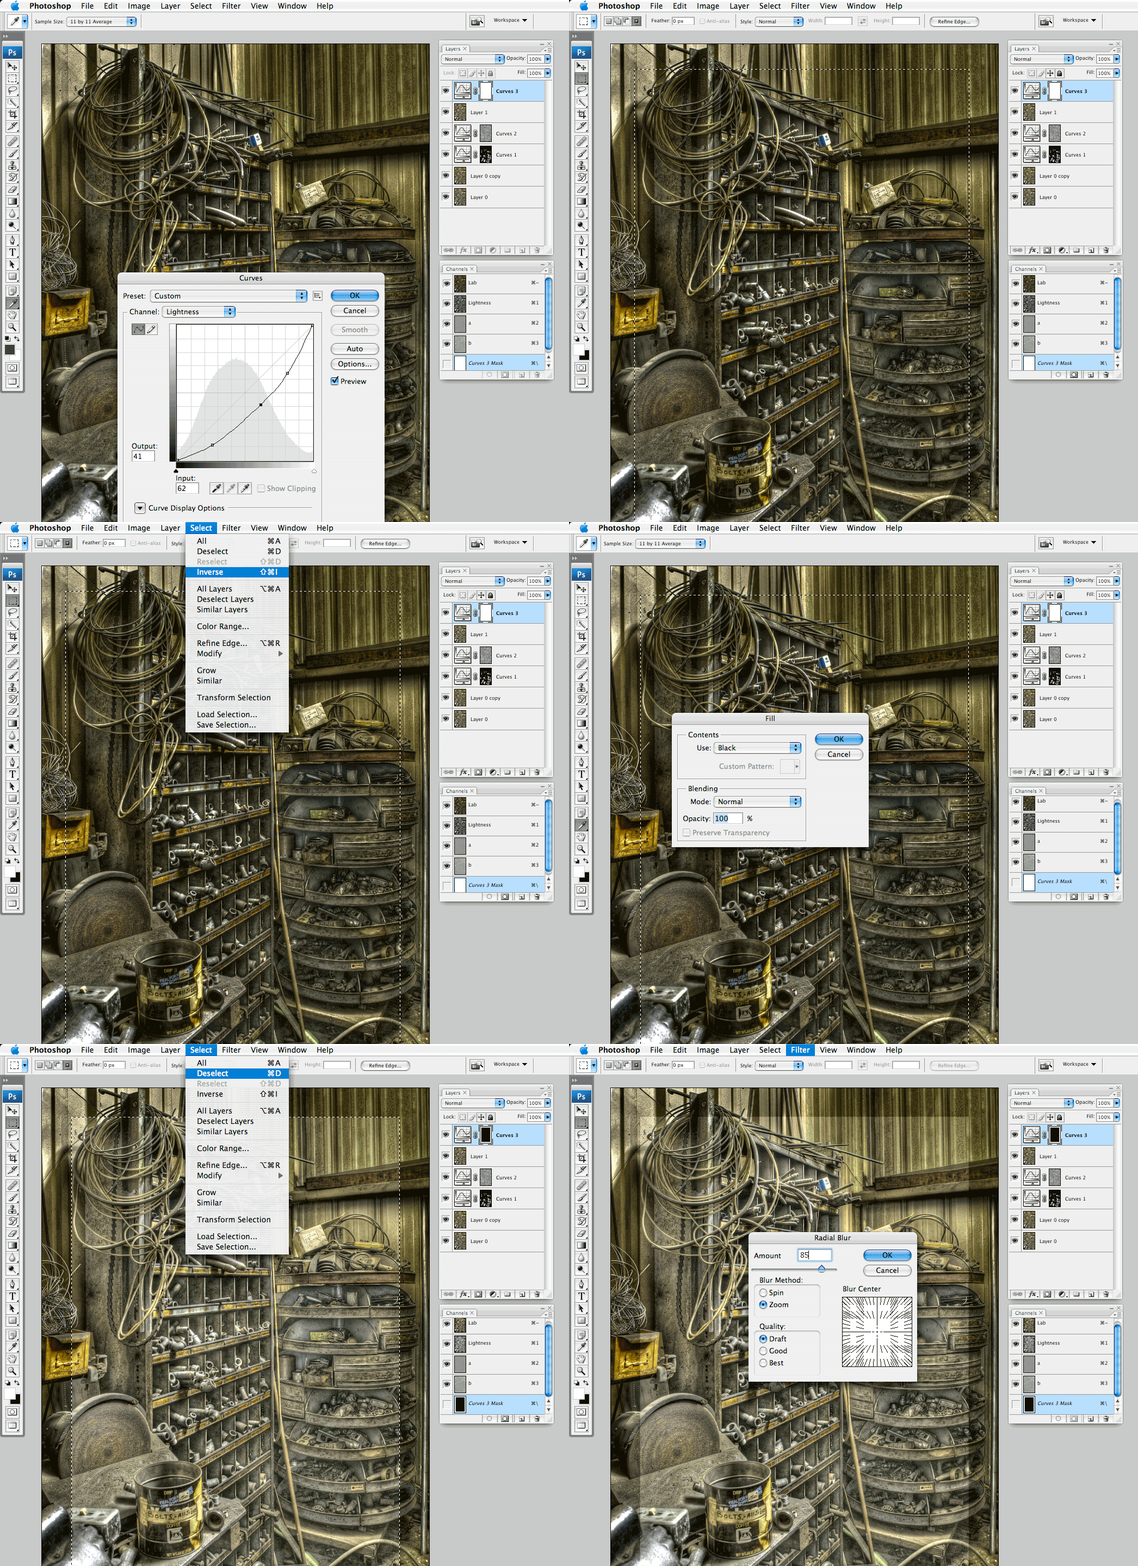
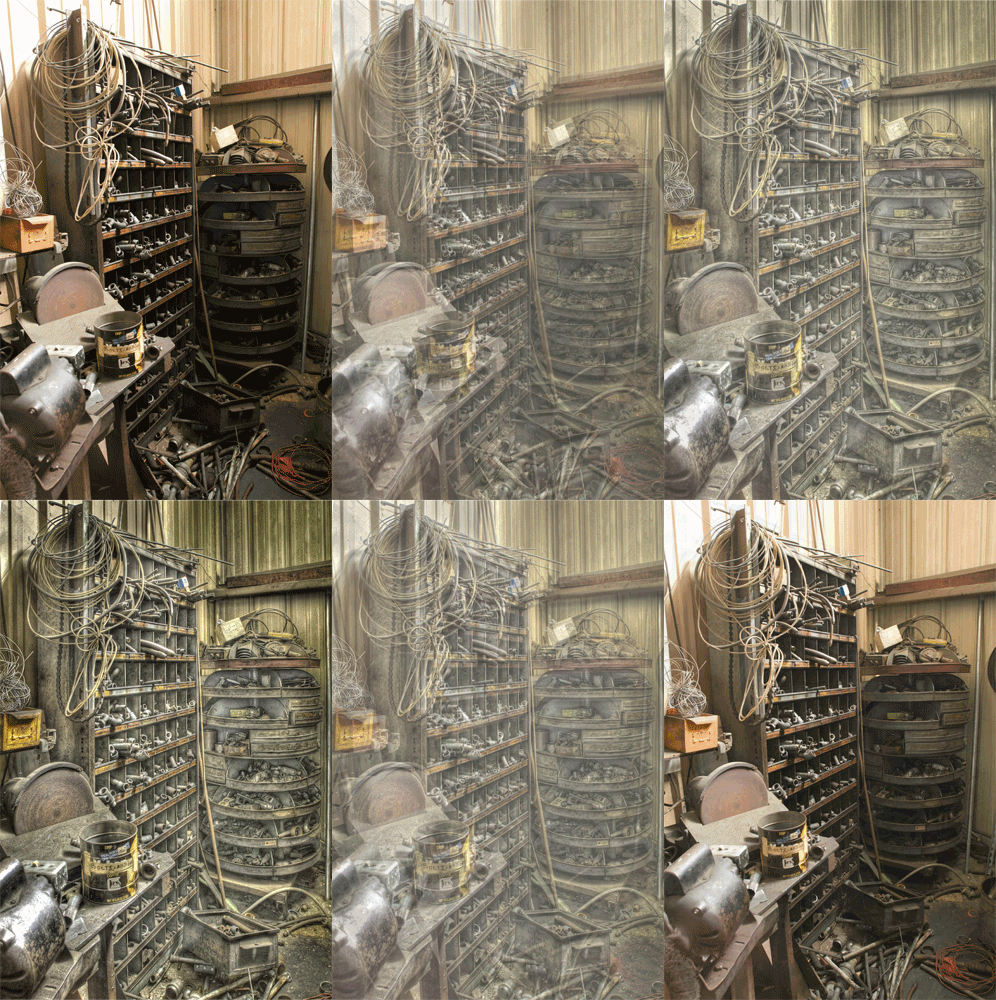
Okay. We're in the home stretch. We left off with most of the tonal adjustments in place. Now its time to add the finishing touches. We're now going to apply some sharpening techniques, but we need to do this on a new layer for flexibility. We need to create a merged layer copy, essentially the entire contents of our layer stack all on a new layer. This can be done via the menu commands, but the best way for me to explain it is using the keyboard shortcut. First make sure the top most layer is selected. Then press Command + Option + Shift + E (Mac), Control + Alt + Shift + E (Windows). You should now have a brand new layer at the top of the stack that is identical to the sum of the layers beneath it. Okay, now with the new layer active, target the Lightness channel, but restore visibility of the composite channel by clicking on the eyeball next to the LAB channel. Now we select Filter > Sharpen > Unsharp Mask. The settings for the first adjustment are going to seem strange. Try something like Amount: 30, Radius: 35, Threshold: 0. This should add some edge contrast and make the image appear more three dimensional, but play with these values until you are satisfied. Remember, the goal here is not to really sharpen, but add dimension. Now with the Lightness channel still selected, repeat the Unsharp Mask command, but this time we want to almost over sharpen the image. Try settings like Amount: 300, Radius: 1, Threshold: 0. Once these are committed we can adjust the opacity of our sharpening layer to taste. Finally, we will add a slight vignette and call it a day (or month). There are a hundred ways to do this but here is one of my go to methods. First create a new curves adjustment layer. Grab a point in the center of the curve and drag it down to darken the whole image, then click OK. Now use the rectangular marquee to draw a selection about an inch or so in from the edges of the frame. Now fill the selection with black and you should see a very sharp, dark edge around the image. To ease the transition from light to dark go to Filter > Blur > Radial Blur. For Blur Method use Zoom, and for Quality use Draft, then raise the amount to about 80 (again this will vary on the size of your image. Click OK and we're done. Save this as a .PSD to maintain all of your layers, then flatten and convert back to RGB and save again as a .JPG, or your favorite file format. This may seem very drawn out and long winded, but the process can go very quickly and once you get used to the workflow you will open up a whole world of tonal possibilities that are hard to replicate by other means. Now go out and impress your friends...


1 comment:
Great job!
Thanks for all the clear detail.
Post a Comment