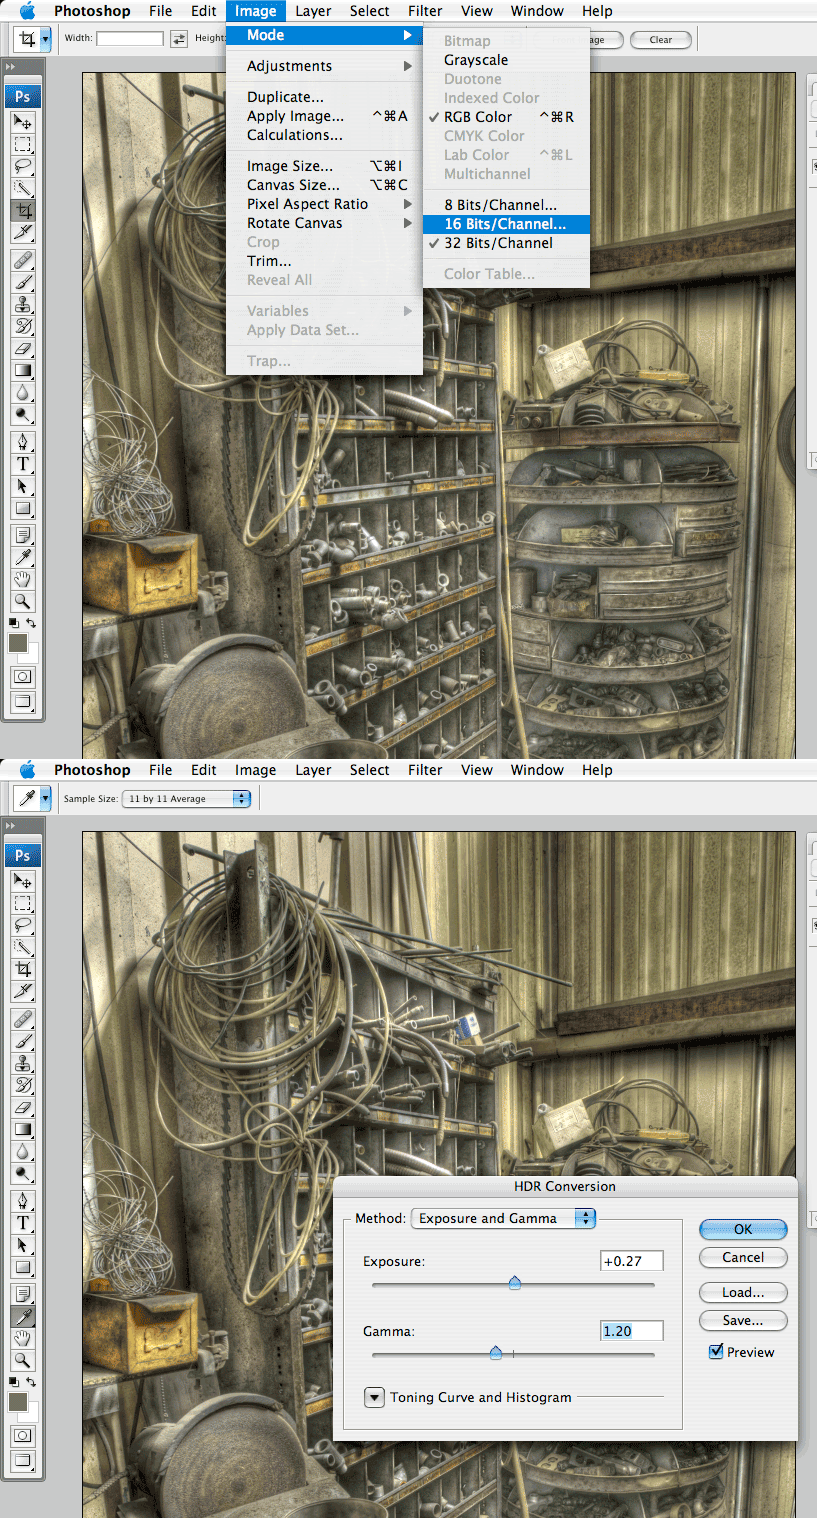


 Well, I should have included this step in with the last post. We left off with a tone mapped 32 bit image. Thats great but Photoshop wont really let you do anything within 32 bit space so we need to take this down to 16 bits per channel. Click on Image > Mode > 16 Bits/Channel. In the resulting dialog use the Exposure and Gamma Method. I would recommend leaving Exposure set to 0 and Gamma to 1.2. These are the defaults and should preserve the appearance of your tone mapped image, but you can make adjustments here if the image merits it. Click okay and the image will be down sampled to 16 bits.
Now we can do things like correct the perspective. In this case I selected Filter > Distort > Lens Correction. I adjusted the Vertical Perspective +35 to make the verticals mostly parallel.
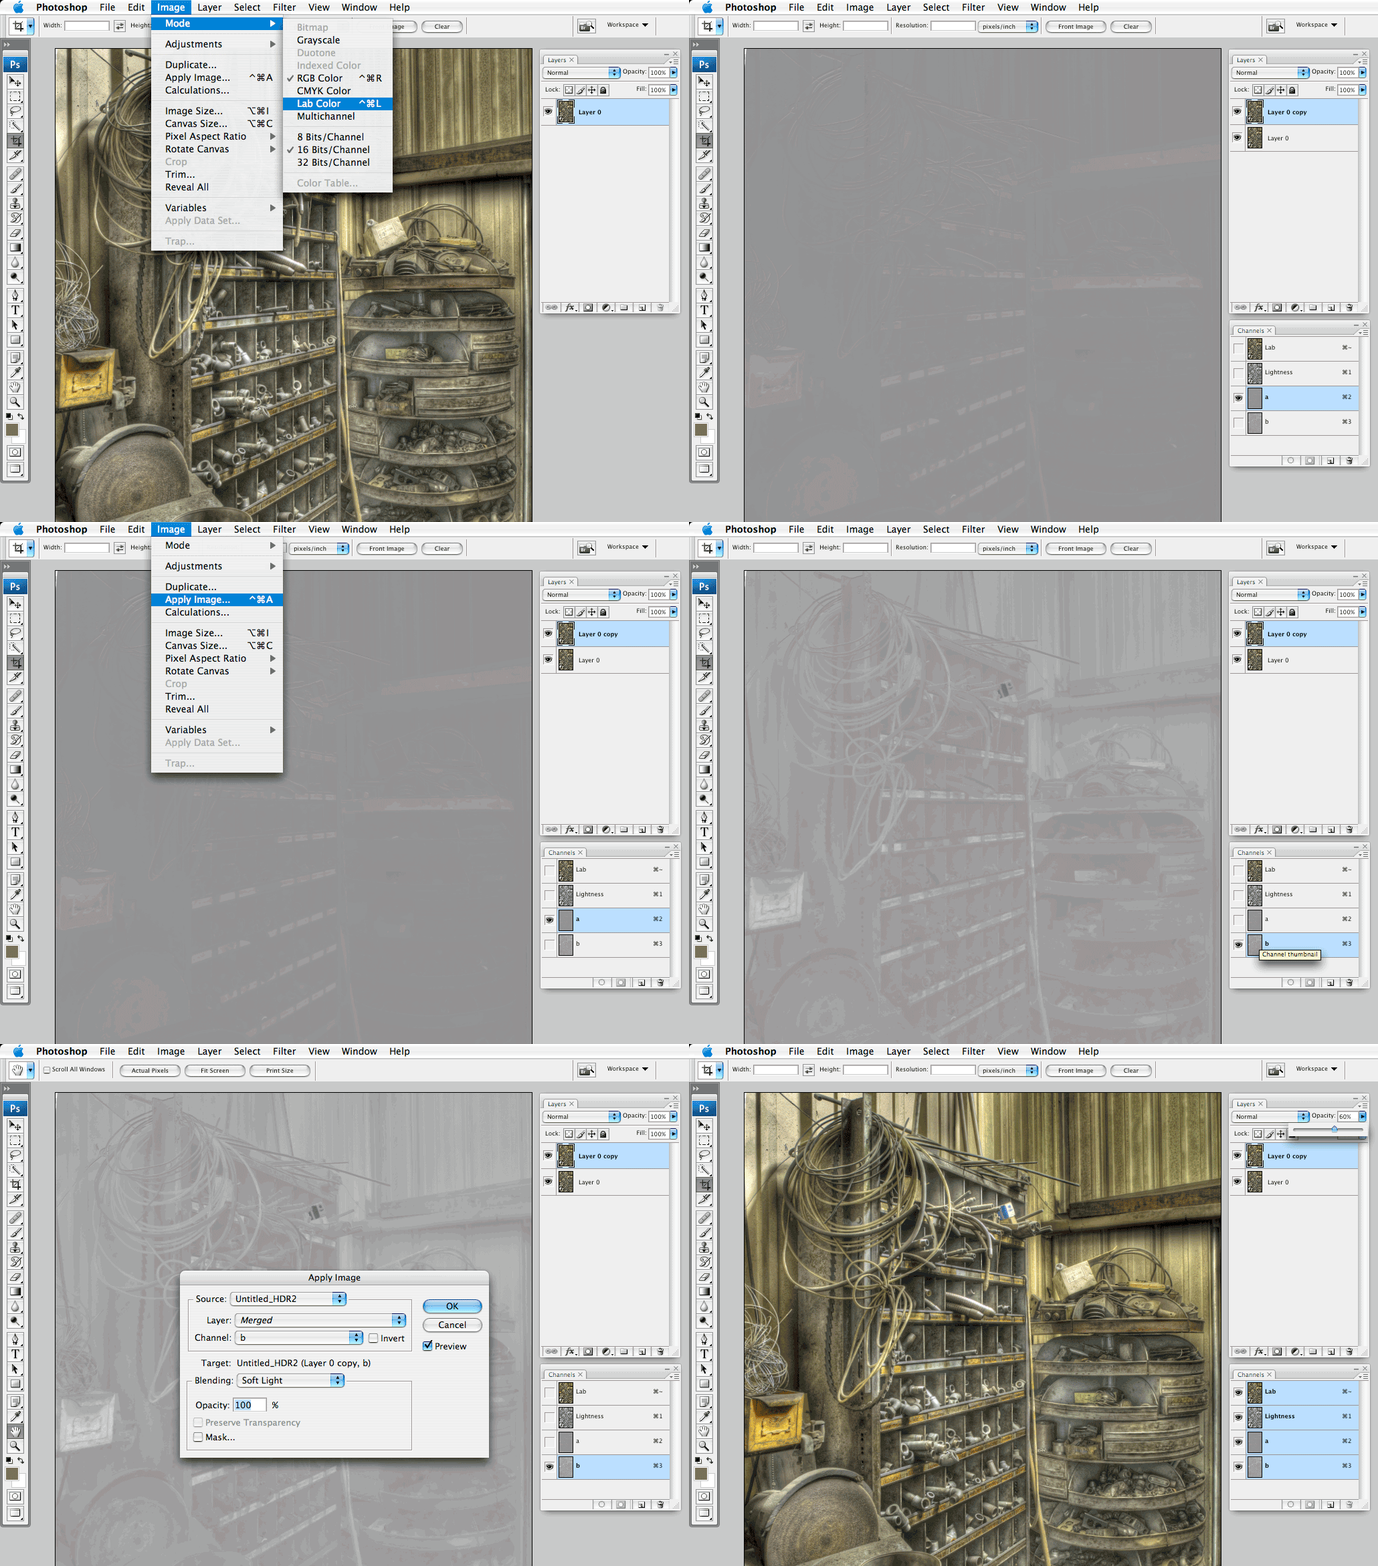
Now we move into my favorite part, LAB color space. Select Image > Mode > Lab Color. You wont notice a change unless your channels pallet is open (if it isn't, I suggest you open it now along with the layers pallet). We then make a duplicate of the layer. So far, so good - now we get tricky. With the copy layer active target the a channel by clicking on it in the channels pallet. Now select Image > Apply Image. In the resulting dialog make sure the target is the "a" channel and change the blend mode to Soft Light. You should see the image become more contrasty. Click OK then target the "b" channel and repeat the Apply image command making sure the target is now the "b" channel and the blend mode is set to Soft Light. Now select the composite Lab channel in the channels pallet and notice that the image is super colorful and saturated. Adjust the opacity of the copied layer in the layers pallet until you are satisfied with the color saturation.
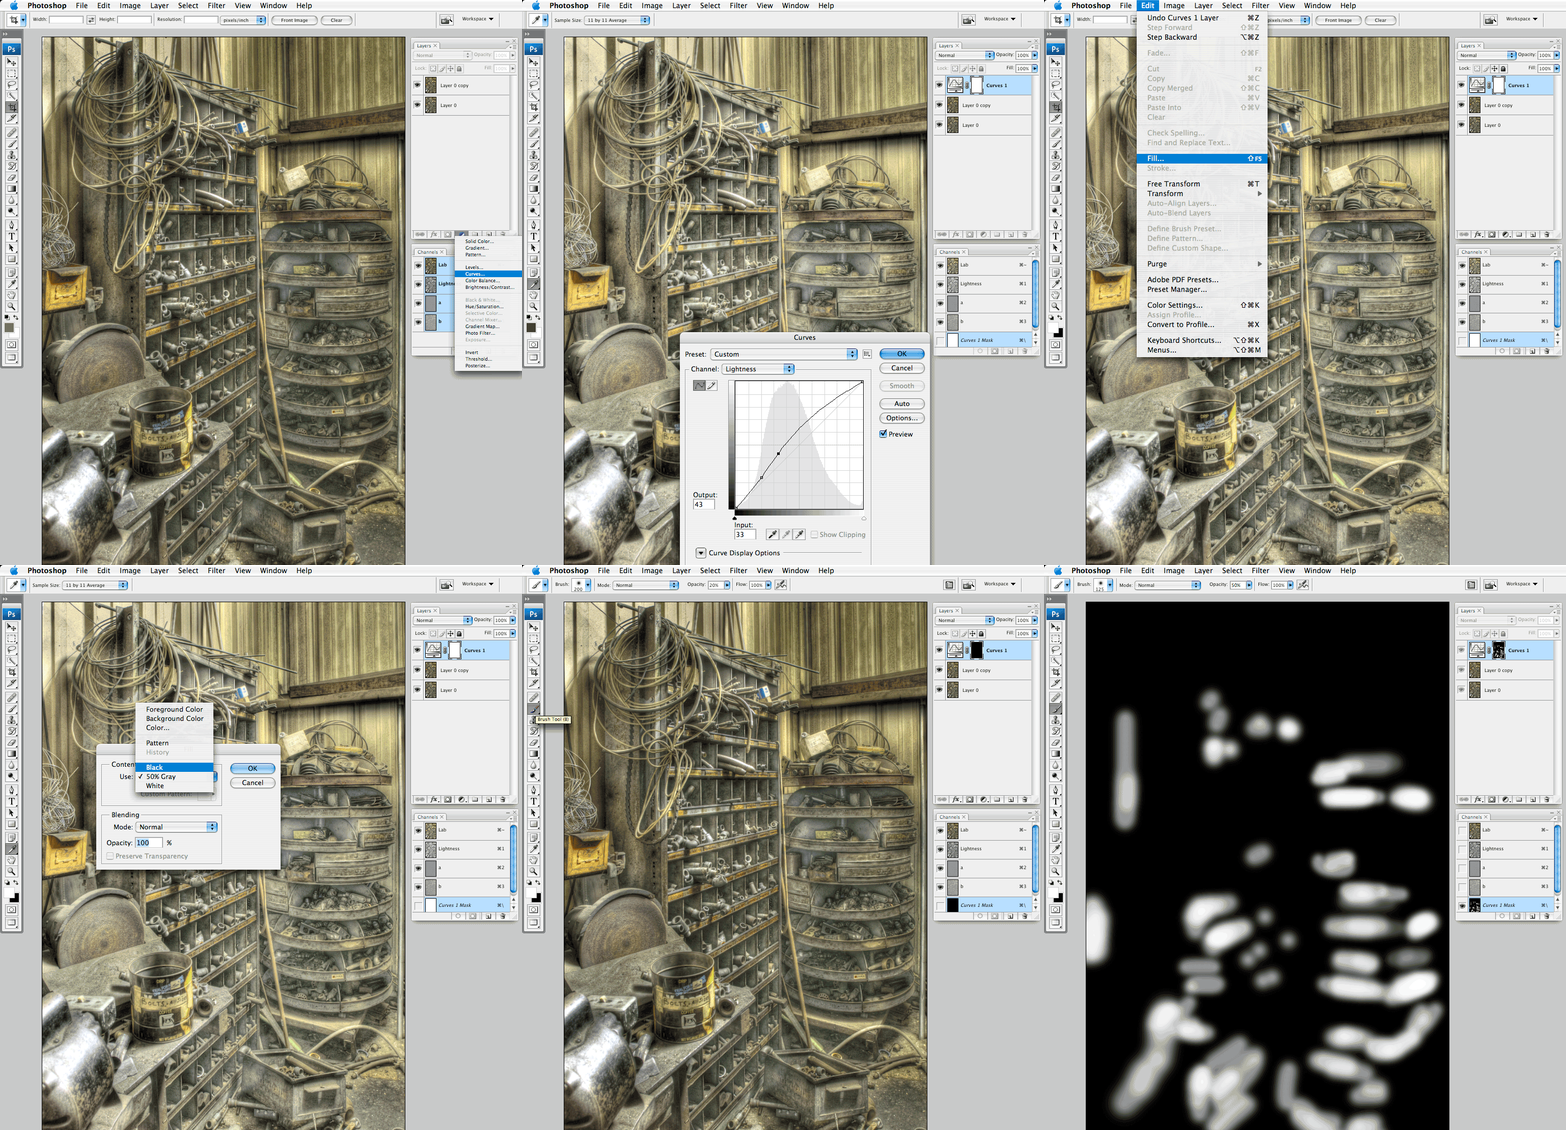
Next we make a curves adjustment layer that brightens the entire image and reveals more shadow detail. I don't really want to brighten the whole image so I fill the adjustment layer mask with black to hide the effect. Now to reveal the effect in the shadows I select a small paint brush with a soft edge, make sure my foreground color is white, and begin to paint onto the mask where I want the adjustment to be seen. Continue painting in the effect until satisfied and remember that we can always adjust the opacity of the adjustment layer if the effect is too harsh.
Finally we make another curves adjustment layer, but this one is set to sort of flatten the contrast. We raise the mid tones while forcing the shadows and highlights to their original positions. Again, I don't want this to affect the entire image so we will use another mask. With the layer mask active, make sure the foreground color is white, background black, then select Filter > Render > Clouds. You should see the layer mask turn a mottled black and white, but it is still too harsh. To smooth it out we select Filter > Blur > Gaussian Blur and use a fairly high radius (this is dependent on the image resolution). Again, the effect is still too much so we lessen it by lowering the opacity of the adjustment layer.
I think this is enough for now. Next week we will tie it all together with some super cool sharpening tricks...
No comments:
Post a Comment